Welcome, dear reader, to day 5 of XWCL’s quarantine journal entries (alternatively, your Monday distraction). We’ve had great entries so far showcasing hobbies and activities of the various XWCL members. To keep in theme, this post will cover a few of the things that I enjoy and how it’s been helping me through quarantine.
COOKING
Anyone, graduate school or not, will agree that food induces happiness. Cooking is my main go-to comfort habit, whether because I feel homesick or it was a rough week where nothing worked. Scent has been known to trigger memories; the term “Proustian memory” is coined from his novel A la Recerche du Temps Perdu where Proust ate a madeline cookie which triggered an involuntary memory of his childhood. For instance, when I miss my family (hi Mom, Dad, and Kuya!), I make a cup of roasted brown rice green tea because that’s our choice beverage while we talk at the table after sharing a meal together at home. Whether small family meal or big family gathering, this roasted brown rice green tea is always present. For me, every step in the process of cooking is a small marathon that instills tremendous joy: exploring the various specialty stores in Tucson for procuring ingredients, setting up all my ingredients “mise en place“, listening to the crackling of ingredients in the hot oil, basking in the aroma of the food simmering, and, of course, eating my rewards (especially when it’s my weekly meal prep). Cooking is a methodical and experimental activity I love to do both solo and group settings. I eagerly try to widen my skillset – my 2 best friends from when my PhD began (hi Bharati and Liliana!) are both vegetarian and enthusiastically helped me as taste testers when I wanted to explore meat alternatives. I’ve gotten better at making lentils, but tofu needs further work to get the texture I want.
KITCHEN APPLIANCES
I believe that a significant portion of why I’ve enjoyed cooking is having the correct tools. Therefore, it’s no surprise that I’ve accumulated a collection of various kitchen appliances. Given my graduate student budget, I acquire many of my appliances through Tucson’s Craigslist or following department store sales (sometimes for months). My best Craigslist purchases have been a KitchenAid stand mixer Pro500 for $100 in 2015 and a Breville deep fryer for $25 in 2018 (this is a fun story for another time), where each were practically brand new. Many people have benefitted from these appliances – XWCL, CAAO, Steward Observatory and OpSci graduate students, to count a few. Some appliances/tools have failed me though – I borrowed a mandoline slicer once to try out and from that experience, I’ll stick to chopping all my vegetables manually, even if they come out uneven or not fine enough. I told myself that when I’m employed after completing my PhD, I’ll buy a brand new Le Creuset enameled cast iron pot. (On sale, of course. Some habits will never cease.)
TRENDY DIY
Given that cooking can be categorized as a DIY activity, I’m always in the agenda to try out making trendy foods. I’ve attempted some recipes posted in social media videos – some good, but also many where I failed epically (like Tasty’s no-bake matcha cheesecake video recipe). Although quarantine in the US began at least a month ago, I’m expecting social media will produce some trendy recipes to try.
All of these things have led me to attempt a trendy recipe roaming about the internet: Dalgona Coffee.
WHAT IS THIS DALGONA COFFEE TREND?
Dalgona coffee is a latte which has a thick, sweet whipped coffee foam placed on top of a cup of milk. This viral trend originated in South Korea, where Dalgona is a sponge candy and is derived from the word dalgoona (English: “sweet”). Dalgona coffee is made with 3 ingredients: water, sugar, and instant coffee (yes, instant coffee). To make it, you mix them together and whip A LOT.
Here’s a video that shows the process:
This really perked my interest – I had all the ingredients without needing to go to the store. I had both instant coffee and instant espresso from my experiments at making coffee-filled dark chocolates. I had the tools. There was nothing stopping me from trying this out, especially since I needed a distraction while staying home.
Additionally, if I need any further convincing, it’s a scientific fact that Astronomy and coffee go together as a combination. Given that we’re doing this blog posts in the style of an observation run, making dalgona coffee fits into the theme.
Through the course of many evenings, I attempted making dalgona coffee and experimented in other variants of it. I’ve documented my learning experience here, so you get to know what works just by reading this whole post.
COMMENTS BEFORE BEGINNING:
- The ingredient portions for all my experiments are for 2 servings. Scaling up or down is possible by maintaining a 1:1:1 ratio. I didn’t test this out, but that’s what the recipes said.
- I recommend using a tall, wide container for mixing. It can get messy doing this. I used the tall measuring cup that came with my immersion blender.
ATTEMPT 1: USING A MILK FROTHER
While I am always eager to cook with minimal and manual tools, I’m not in the agenda to sit with a whisk for 10 minutes trying to whip this foam. My friend has done it manually and commented the experience “like some Edwardian kitchen maid” (hi Jordan!). I use a $3 milk frother when I make my morning caffeine drink (Mexican hot chocolate with instant espresso), so it’s obvious that it should do the job for making dalgona coffee, right?
INGREDIENTS: 2 tbsp instant espresso, 2 tbsp granulated white sugar, 2 tbsp room temperature water
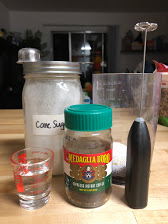
Cast of ingredients 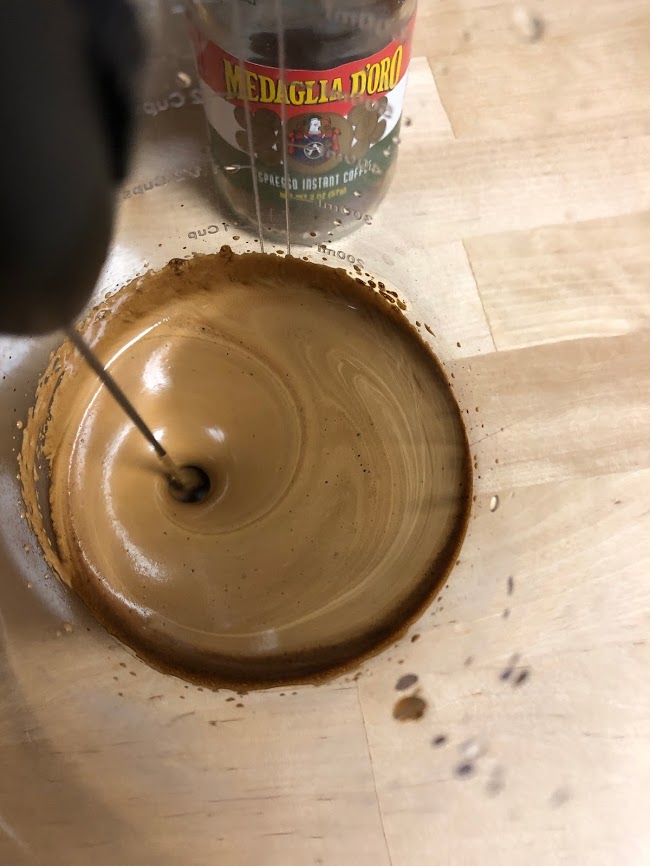
Building up the foam 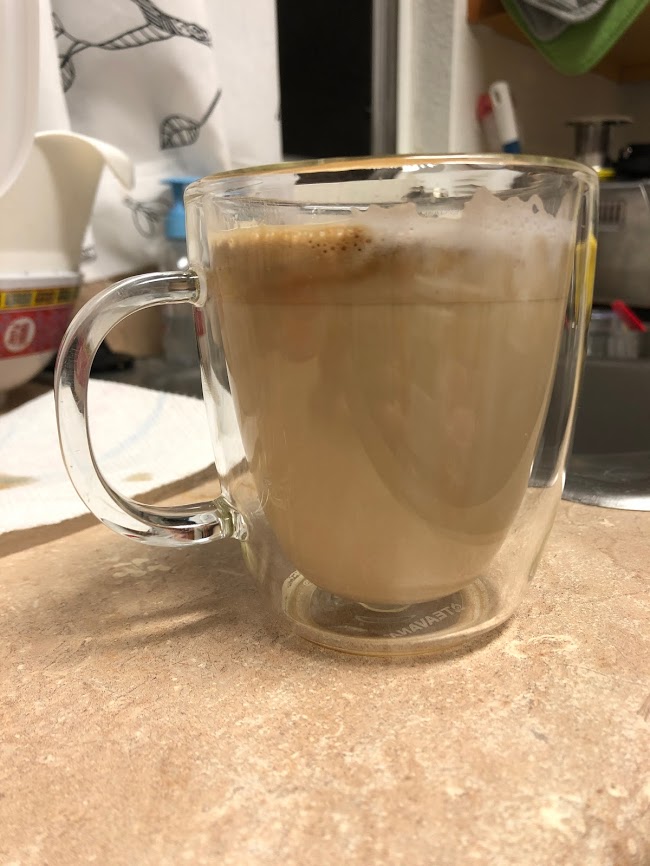
Final result, 10 min later
VERDICT: The milk frother does help with starting up the foam. However, the frother is neither strong nor fast enough. It couldn’t bring in enough air into the foam to make it thicken up like in the video. A successful dalgona foam is light and thick, but this one did not come out light enough. I’ve been told (hi Martin and Jastine!) that even if you tried with using a hand whisk after the milk frother, the foam is still not good enough. Therefore, I do not recommend using a milk frother to build the foam exclusively.
HOW DID IT TASTE: Really good! Really sweet, though.
ATTEMPT 2: USING AN ELECTRIC HAND WHISK AND HOT WATER
Within my cupboards of kitchen tools and appliances, I have an electric immersion blender which has an attachable whisk and food processor unit. I didn’t want to bring it out the first time because it’s a large, clunky item that requires a wall outlet for power. Plus, I store it on a shelf that requires me to use a stepping stool to reach. After perusing through a few articles, I learned that using hot water instead of cold water creates the foam faster.
INGREDIENTS: 2 tbsp instant espresso, 2 tbsp granulated white sugar, 2 tbsp hot water
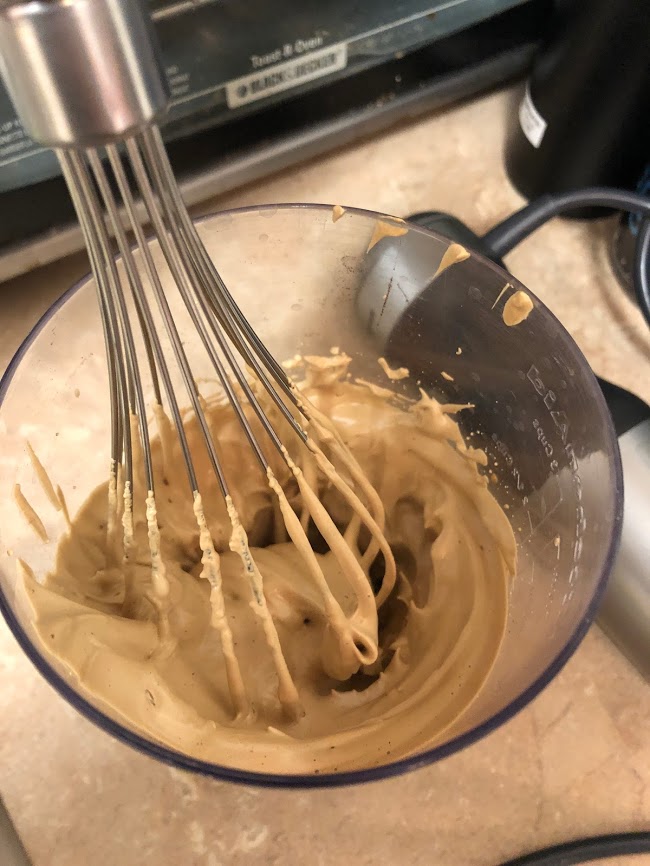
This is the color of the foam you’re looking for in dalgona coffee. The texture is also very strong, keeps together.
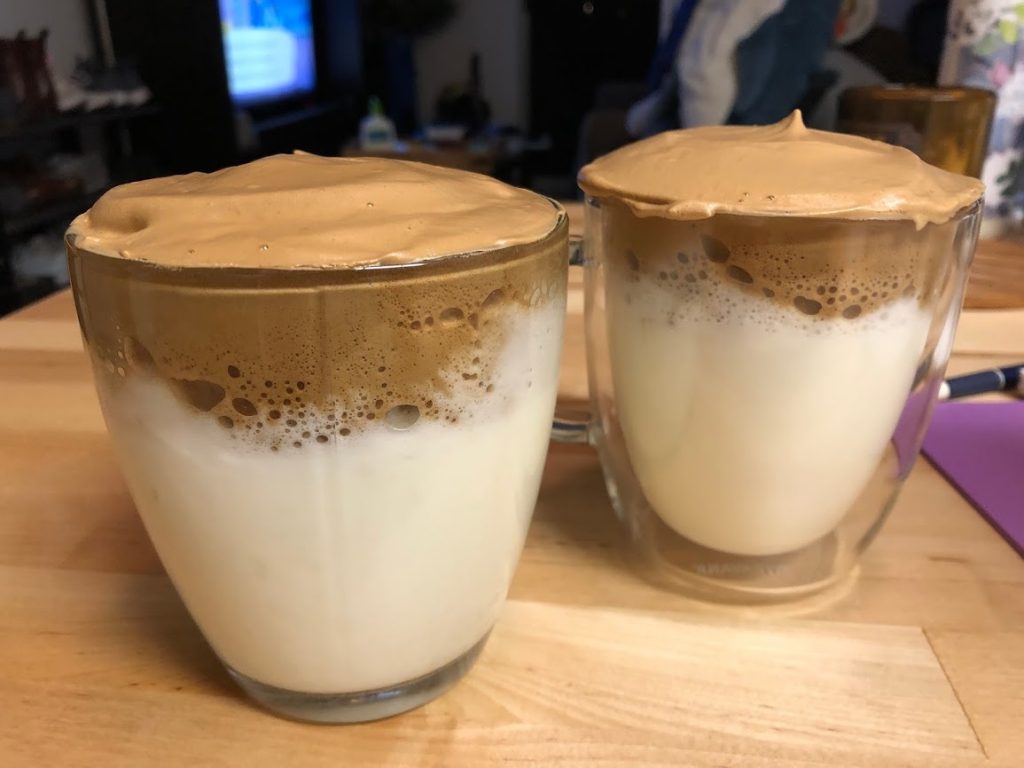
Final product 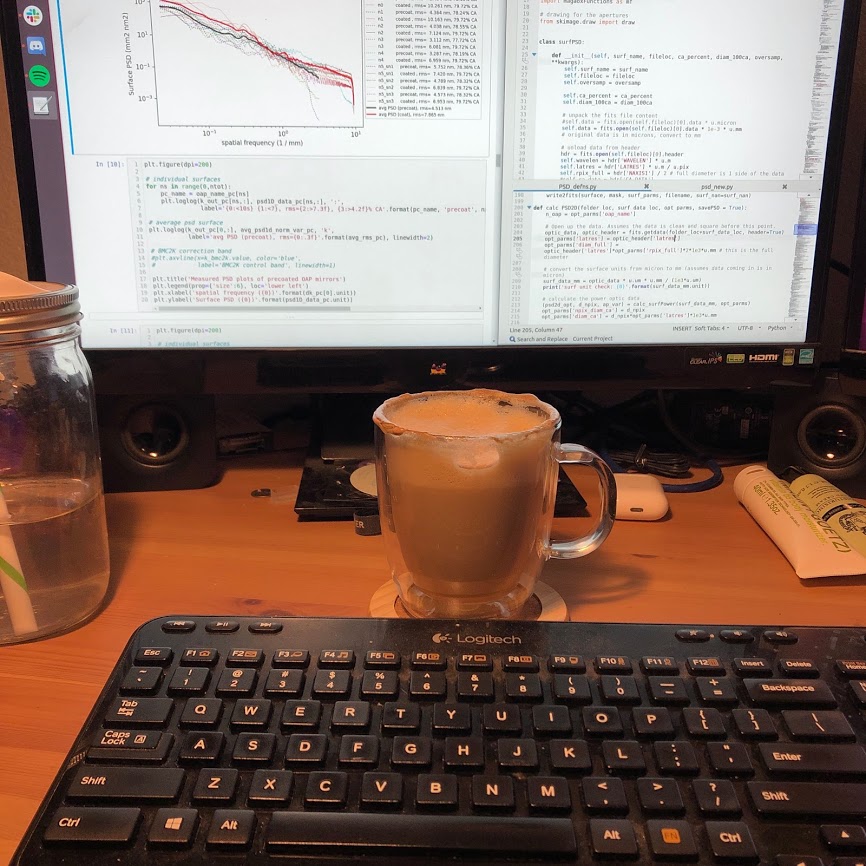
Fuel to fix the PSD code
VERDICT: This worked super well! I used the milk frother in the beginning to initialize blending the ingredients together. Then I used my electric whisk attachment to bring up the foam. My immersion blender has 3 speed settings and the fastest one worked best. It worked very fast – in less than 5 minutes, I got the thick foam! The foam stuck to itself so well that it made transferring to a mug with hot milk very easy.
HOW DID IT TASTE: Really good! But it was also very difficult to mix the hot milk and the foam together. The foam also starts hardening up on the edge of the cup.
With one successful case* after two attempts, this convinced me to start experimenting with the recipe.
* Please don’t use this statistics logic for your research
EXPERIMENT 1: USING POWDERED SUGAR AND LOW QUALITY INSTANT COFFEE
One major problem I had with the original recipe is that it’s too sweet. I do like sweet foods, but not to this level of sweet. To cut down the sugar, I used 2 tbsp powdered sugar, which has the same sweetness as 1 tbsp granulated sugar. I had powdered sugar lying around from the gatherings I attended pre-quarantine where I bring my deep fryer to make fresh deep fried oreos. Also, to get into the spirit of the recipe, I replaced the instant espresso with some Folgers instant coffee.
INGREDIENTS: 2 tbsp instant coffee, 2 tbsp powdered sugar, 2 tbsp hot water.
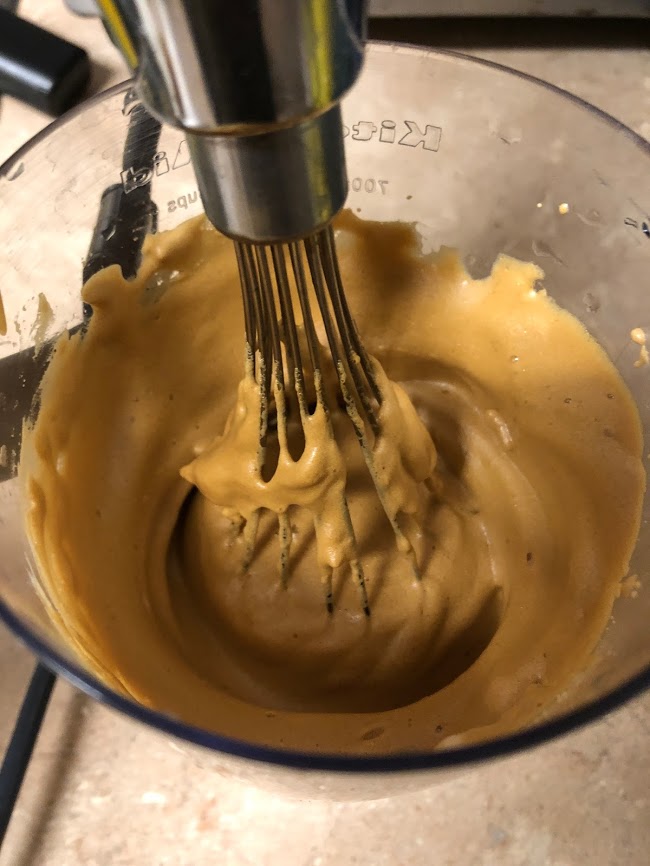
Foaming it up 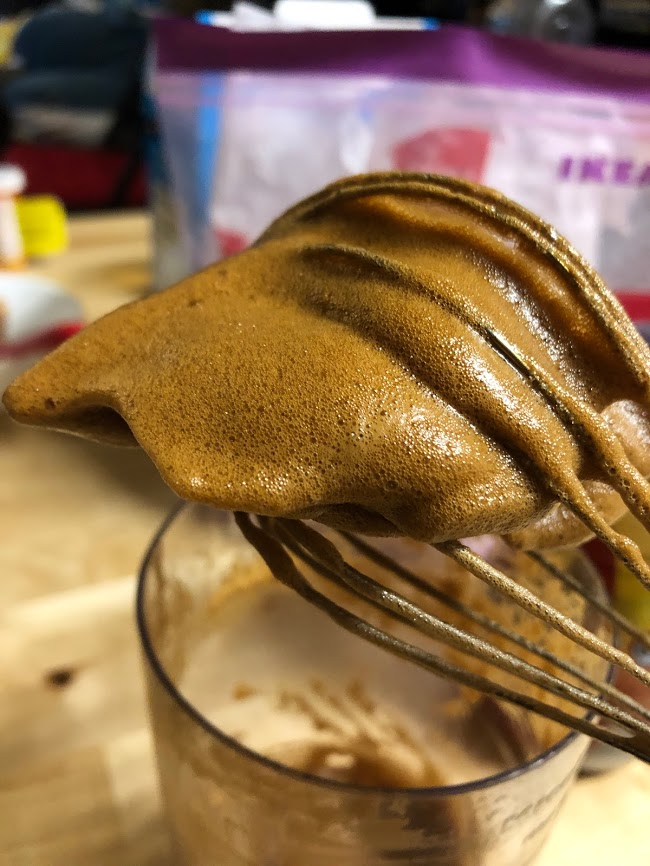
Airy foam 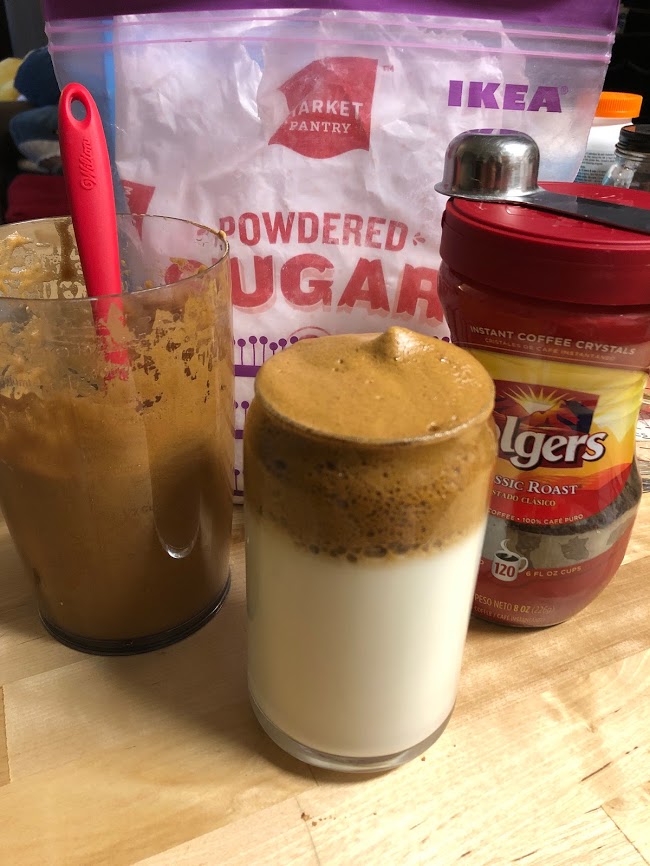
Final product
VERDICT: This one came out BEAUTIFUL. However, since powdered sugar was used, the foam came out much less heavy than with granulated sugar. There were a lot more air bubbles that made the foam lose its form after a while. The instant coffee also made the foam pick up super fast.
HOW DID IT TASTE: Love that it’s less sweet, but not enough coffee punch. I’ve rediscovered that Folger’s is cheap for a reason.
EXPERIMENT 2: CAN WE DO IT WITH CHOCOLATE?
As you may know from a past blog post, I’m a hobby chocolate confectioner. I started making green tea chocolate when I began my PhD, and have recently figured out how to make coffee-filled ganache dark chocolates. Therefore, for this dalgona coffee challenge, the next logical test was seeing how I can mix in chocolate for this foam. Should taste good, right?
INGREDIENTS: 1 tbsp granulated sugar, 1 tbsp powdered sugar, 1.5 tbsp instant coffee, 1.5 tbsp hot water, 0.5 tbsp dark cocoa
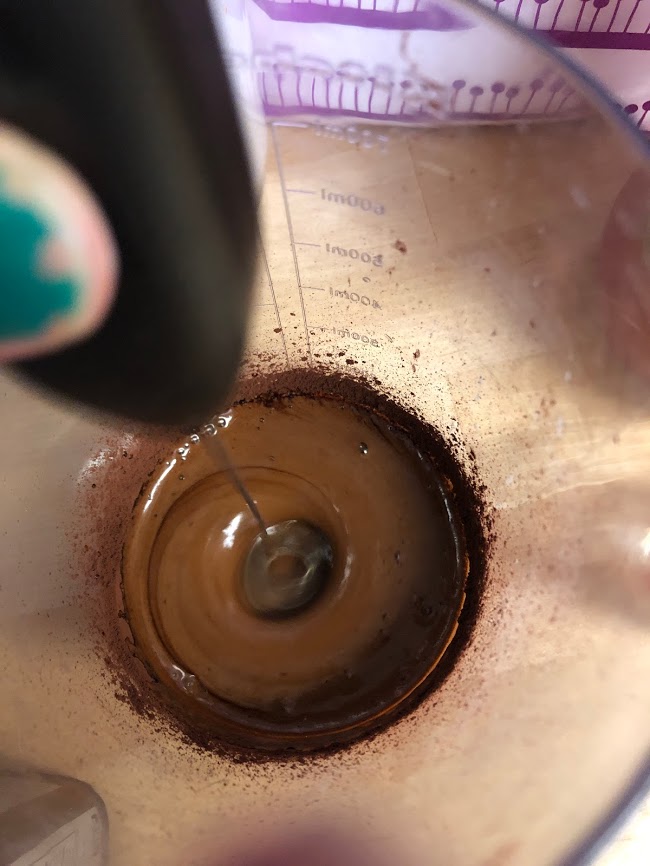
Looking promising 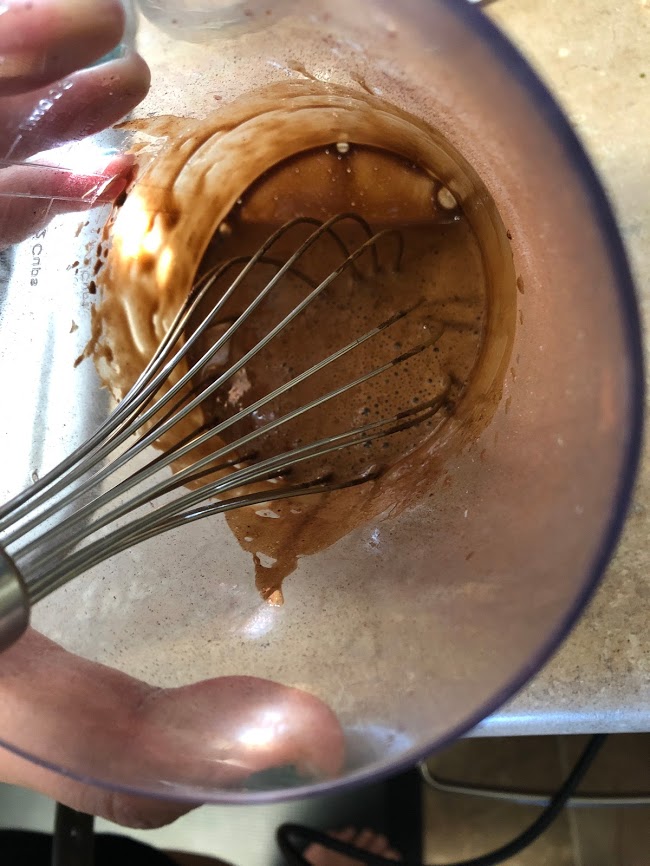
But it didn’t hold up 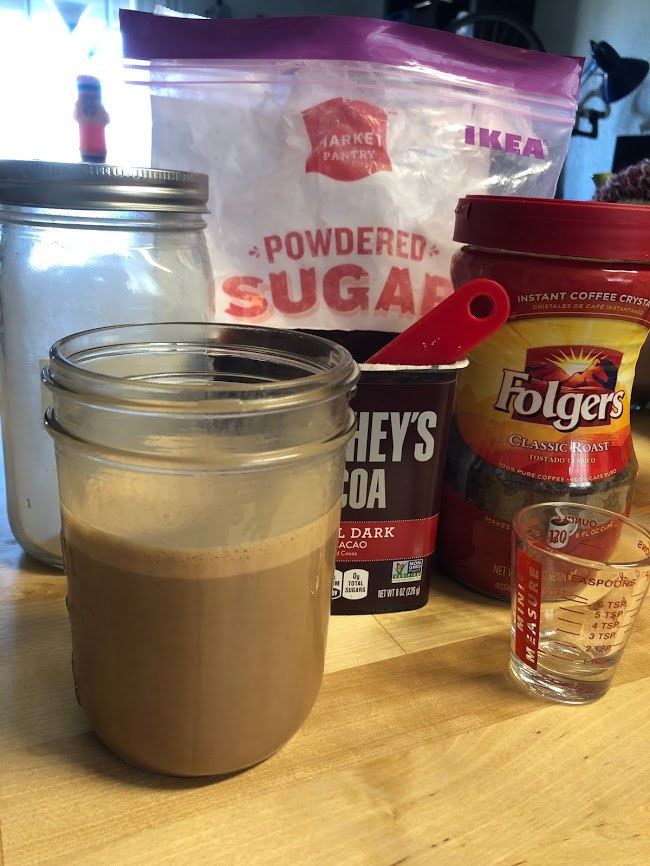
Final result
VERDICT: I mixed together the sugars, instant coffee, and water together with the frother to get the foam going, then added in the cocoa powder. After that was mixed together well enough, I went to the electric whisk. However, the foam started collapsing and turned in syrup-like form. Even after 10 minutes on the highest speed of my electric whisk and tilting the container to add more air, the foam refused to build up. Back to the drawing board on how to add in chocolate!
HOW DID IT TASTE: Didn’t want this to go to waste, so it was mixed with cold milk to make chocolate milk. This was the most effort mocha chocolate milk I have ever made. Tasted good, but no dalgona coffee.
EXPERIMENT 3: DOES IT KEEP?
As you may notice, the recipe makes up to 2 servings (or more) worth of foam. But for all that effort and you only wanted 1 serving, how do you make the rest not go waste? I’ve read in some articles that the foam can last for a day or two inside the refrigerator. Is this true? Let’s test an overnight case.
INGREDIENTS: 2 tbsp instant espresso, 2 tbsp granulated sugar, 2 tbsp room temperature water
Here’s photos of the foam the night before:
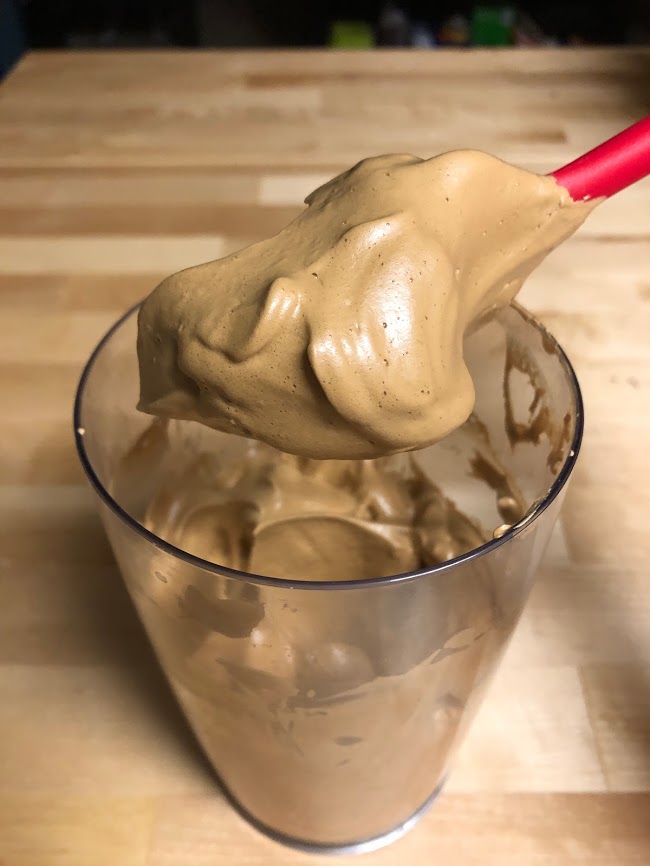
Freshly made night before 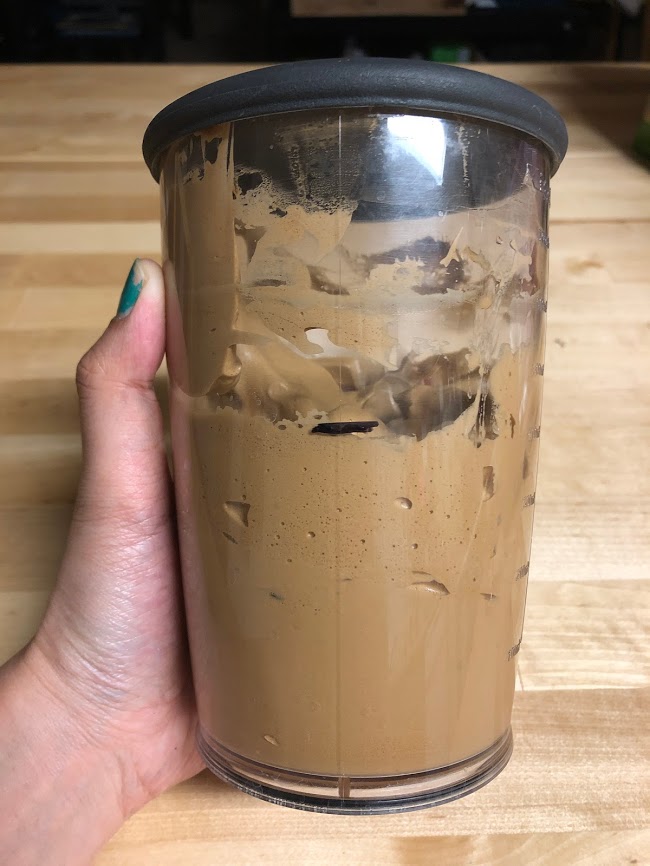
Marker to see where it began
And here’s the photos from the next day after 11 hours sealed in the refrigerator:
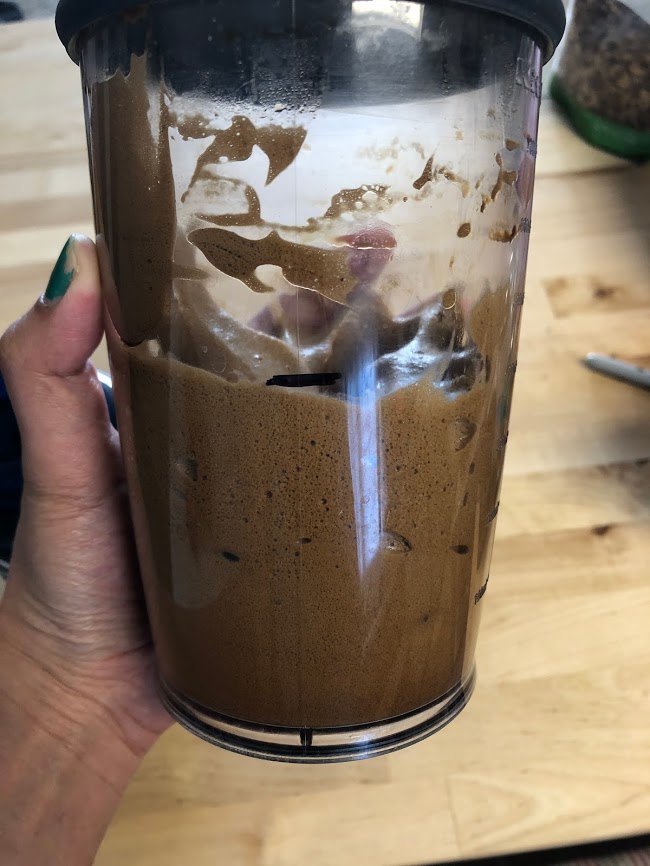
The foam, 11 hours later 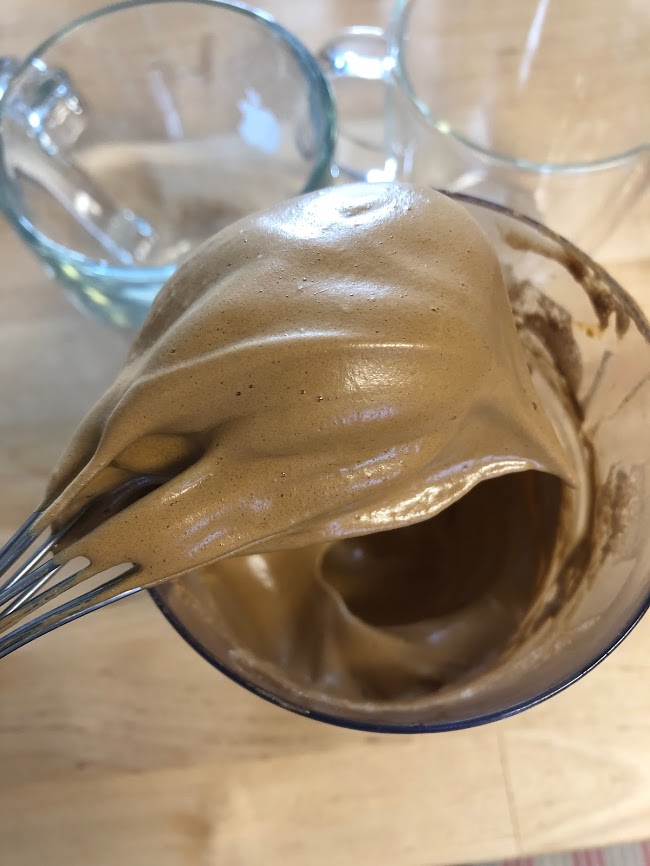
Good again after some manual whisking
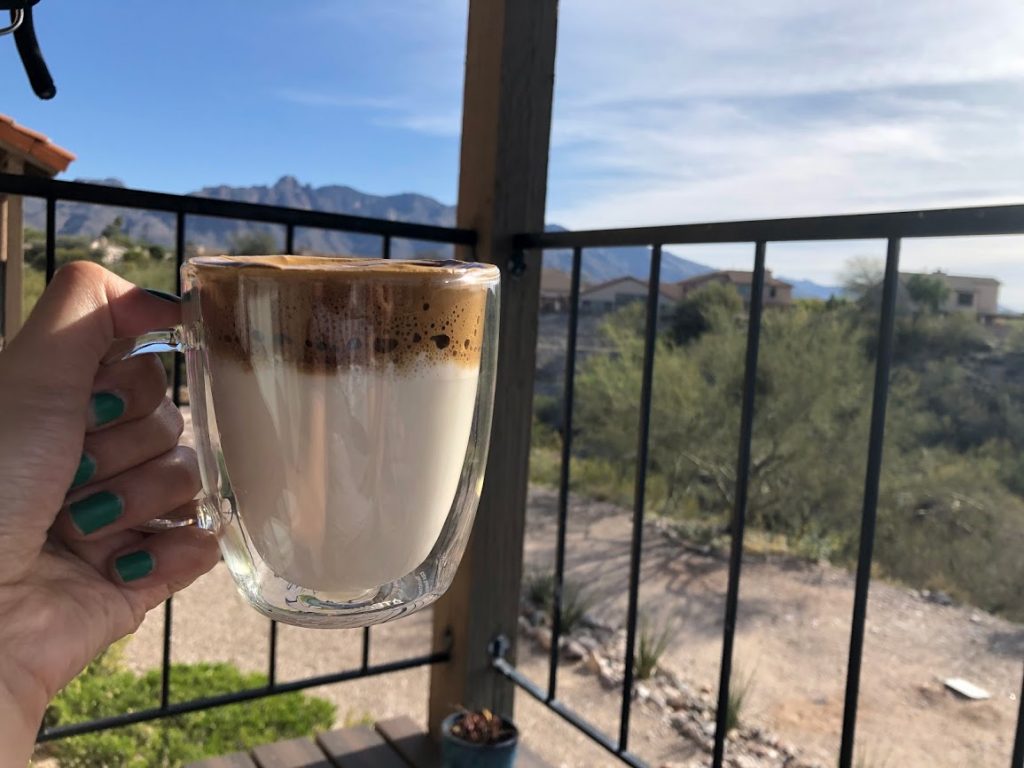
Here’s to a good morning with dalgona coffee and my balcony!
VERDICT: I didn’t document this part, but the reason the foam shrank was because the coffee was separating from the foam. This was easily fixed using a small whisk and whipping for a minute or two. It didn’t build up to the level from when it was freshly whisked, but that’s easily attributed to that I didn’t work hard in adding more air back in. The foam returned to a lighter color and was nice and thick like it was fresh, but maybe a bit more dense than freshly whipped with an electric whisk.
HOW DID IT TASTE: Pretty good! It fueled a lot of writing this post.
FINAL WORDS
Someone challenged me to try it with matcha (hi Jaren!), but it ended up with the same watery result like the chocolate one. I read somewhere that the foam forms because of fat/oil present in the coffee that interacts with the sugar. I suspect that there’s probably something going on with the cocoa powder and matcha that inhibits the foam from taking. I’ve talked with someone who made a matcha version (hi Jade and Adolfo!), but it only worked when they adding in milk, which formed a whipped cream type foam. I read one recipe that recommended using egg whites so the foam builds up like meringue, but that would require me pasteurizing the egg (I am not taking any chances with this pandemic). I’m no food scientist and only a hobby cook at best, so I welcome an explaination to what happened. It’ll make me a better cook!
FINDINGS:
- Hot water versus room temperature water: I’ve experimented using both and found that there wasn’t a distinct difference between the final result foam. I did find that the hot water mixed the coffee and sugar much easier than room temperature water. This may change depending on the sugar and instant coffee you use.
- Instant espresso versus instant coffee: besides the obvious flavor profile, I did not find the foam any different from either. I won’t ever recommend Folgers, but I do recommend the instant espresso I used. If you’re in Tucson, you can find it at Roma Imports (assuming it’s in stock when they reopen during quarantine). Alternatively, I’ve found it on Amazon.
SUGGESTIONS FOR THE READER TO EXPERIMENT FOR ME:
- Using real coffee: I imagine it’ll taste good, but the coffee will need to be concentrated. Too much fluid might be too watery for the foam to take.
- Alternative types of sugar: I only tested using granulated cane sugar and powdered sugar. But would it be different if you used raw sugar? How about sugar alternatives like monk fruit sugar or splenda?
I hope you’ve enjoyed my journey through experimenting on dalgona coffee. I recommend trying it out – even if you don’t get the foam, it still tastes really good mixed in with the milk. Please let me know if you try it out – I’m always welcome to discussing this. Post up some really pretty pictures of your attempts.
Special thanks to Aldo for exploring through this whole process with me and consuming the second serving of all the successful attempts.
SONG OF THE DAY
The song of the day comes from 2 things I’ve been doing while under quarantine – experimenting on whipping dalgona coffee and listening to synth wave instrumental music while wranging my simulation code. The venn diagram overlap of these 2 things comes in the form of this song:
Okay dalgona coffee, let’s post-process out some zernike modes from these mirrors.